White kitchen cabinets are a timeless choice for Austin homeowners. But over time, even the brightest white cabinets can start to look tired — not because of the doors or paint, but because of worn, rusty, or outdated hardware. Restoring your cabinet hardware the right way can instantly refresh your whole kitchen without a full remodel.
In this guide, we’ll walk through how to properly restore the hardware of white kitchen cabinets, when it’s better to replace instead of repair, and how to choose the right finishes to match your Austin, TX home and lifestyle.
Why Cabinet Hardware Matters So Much for White Kitchens
On white kitchen cabinets, hardware becomes a major design element. Knobs, pulls, and hinges create contrast, define the style, and influence how “finished” the kitchen looks. Worn brass, chipped black pulls, and squeaky hinges can make even freshly painted cabinets look dated or neglected.
Properly restored hardware can:
- Improve the overall appearance of your white kitchen cabinets
- Enhance functionality with smoother opening and closing
- Extend the life of your cabinets and doors
- Increase perceived home value for future resale in the Austin market
Before you decide on a full kitchen cabinet replacement, it’s worth evaluating whether restoring the hardware will give you the transformation you want.
Step 1: Inspect Your Existing Cabinet Hardware
Start by carefully inspecting all cabinet hardware in your white kitchen:
- Knobs and pulls: Look for scratches, peeling finish, rust, and loose screws.
- Hinges: Check for squeaks, misalignment, doors that won’t close properly, or visible corrosion.
- Drawer slides: Test every drawer for sticking, grinding, or wobbling.
- Finish compatibility: Consider whether the current hardware finish (brushed nickel, chrome, black, brass, etc.) still matches your style and other fixtures.
As you inspect, decide which pieces can be restored and which are better to replace. Severely rusted or bent hardware is usually not worth saving.
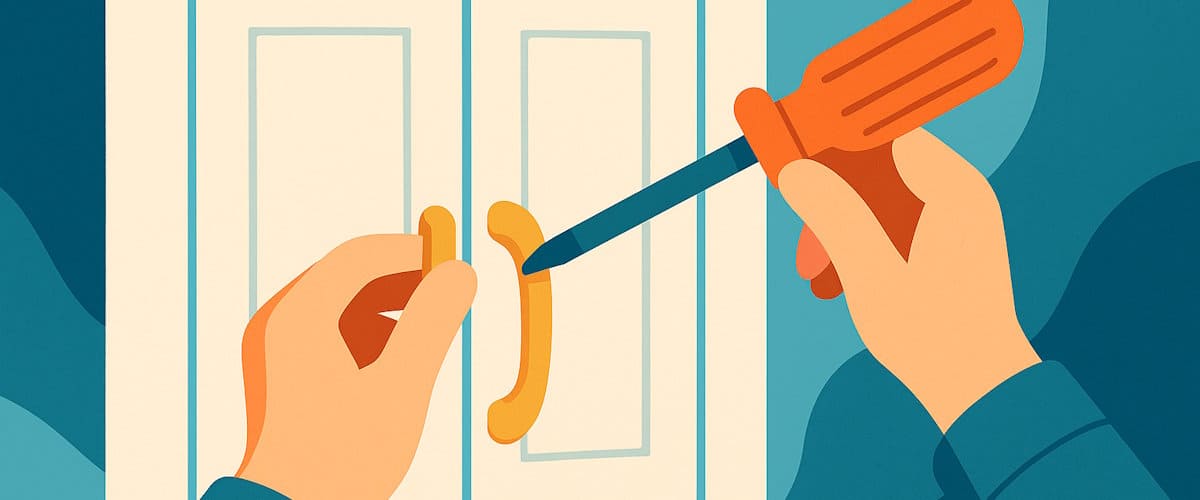
Step 2: Carefully Remove Hardware from White Cabinet Doors and Drawers
Removing hardware properly protects your white cabinet doors and prevents damage to the paint or finish.
- Label everything: Use small bags or containers for each door or drawer and label them. This helps you reinstall the correct screws and hinges later.
- Protect the cabinet surface: Place a soft towel or painter’s tape around the area where you’ll be unscrewing hardware to avoid accidental scratches.
- Use the right tools: A good screwdriver that matches the screw head will prevent stripping.
- Work methodically: Start at one end of the kitchen and move in one direction so you don’t miss anything.
Once all knobs, pulls, and hinges are removed, you’ll have a clear view of the white cabinet surfaces and can also decide if any touch-up paint is needed around the hardware holes.
Step 3: Deep Clean the Hardware Before Restoration
Proper cleaning is essential before you attempt to restore or refinish cabinet hardware.
To clean your kitchen cabinet hardware:
- Fill a bowl or bucket with warm water and a mild dish soap.
- Soak the hardware for 10–20 minutes to loosen grease and grime.
- Use a soft brush (an old toothbrush works well) to scrub around screw holes, threads, and detailed areas.
- Rinse thoroughly and dry completely with a lint-free cloth.
If there is heavy grease build-up (common in busy Austin kitchens), you may need a stronger degreaser. Always test the cleaner on a small, hidden area first to be sure it won’t damage the finish.
Step 4: Remove Rust, Tarnish, and Old Finish
Once the hardware is clean, you can begin removing any rust or worn finish. The method you choose depends on the material and condition.
For Light Tarnish or Minor Wear
- Use a non-abrasive metal cleaner or polish suitable for the specific metal (brass, nickel, chrome, etc.).
- Apply with a soft cloth and rub in small circular motions.
- Buff off residue until the surface looks even and smooth.
For Rust or Significant Finish Damage
- Use fine steel wool or a fine-grit sanding sponge to gently remove rust spots.
- A vinegar soak (for steel or iron hardware) can help break down rust before scrubbing.
- For heavily coated hardware, a chemical paint/finish stripper may be needed. Follow safety directions and work in a ventilated area.
Be careful not to over-sand decorative details, as this can alter the look of the hardware. If the damage is too deep, replacement hardware may be a better choice.
Step 5: Refinish or Repaint the Cabinet Hardware
After your hardware is stripped and smoothed, you can refinish it to complement your white kitchen cabinets and overall home design.
Popular Hardware Finishes for White Kitchen Cabinets
- Brushed nickel: Clean, modern, and works well with stainless steel appliances.
- Matte black: Bold contrast against white cabinets, very popular in Austin contemporary and farmhouse-style homes.
- Polished chrome: Sleek and reflective, ideal for modern or transitional kitchens.
- Brushed brass or champagne bronze: Warm and sophisticated, great for adding a touch of luxury to white cabinets.
How to Spray-Paint Cabinet Hardware
- Lay hardware on a piece of cardboard or a wire rack.
- Use a metal-rated spray primer to help the paint adhere and last longer.
- Apply thin, even coats of spray paint designed for metal surfaces, allowing drying time between coats.
- Finish with a clear protective topcoat to resist scratches and everyday wear.
Allow the hardware to cure fully based on the paint manufacturer’s instructions before reinstalling. Rushing this step can lead to smudges or fingerprints on the new finish.
Step 6: Lubricate Hinges and Drawer Slides
Restoring kitchen cabinet hardware is not just about appearance. Functionality matters too.
- Use a silicone-based or dry lubricant on hinges to reduce squeaks and ensure smooth motion.
- Clean drawer slides with a brush and vacuum to remove crumbs and dust.
- Apply a small amount of lubricant to metal slides to improve performance.
Smooth, quiet doors and drawers make your white kitchen feel more high-end and well-maintained.
Step 7: Reinstall the Hardware on Your White Cabinets
Once your hardware is clean, refinished, and fully dry, it’s time to reinstall it.
- Check alignment: Hold each knob or pull in place before tightening screws to make sure it sits straight and centered.
- Use a drill guide: For new hardware or new holes, use a cabinet hardware template or jig to keep spacing consistent.
- Tighten gently: Over-tightening can crack the cabinet door surface or damage the paint.
- Test as you go: Open and close each door and drawer to ensure everything lines up and operates properly.
On white cabinets, even small misalignments are highly visible, so take your time with this step.
When to Restore vs. When to Replace Cabinet Hardware
Restoring is a great option when you:
- Like the existing style and placement of hardware
- Have solid, high-quality metal hardware that has just lost its shine
- Want to refresh your kitchen on a modest budget
- Prefer a more sustainable, eco-friendly approach
Replacement might be the better choice when you:
- Have cheaply made hardware that bends or breaks easily
- See severe rust, pitting, or structural damage
- Want a completely new style for your white kitchen cabinets
- Are planning a broader kitchen refresh or preparing your home for sale in Austin
If you’re unsure whether restoration is worth it, a professional cabinet restoration company can inspect your hardware and give you an honest recommendation.
Choosing New Hardware That Fits Your Austin, TX Home
If you decide to replace instead of restore, choose new hardware that fits both your white cabinets and the overall style of your home.
Consider:
- Home style: Modern, farmhouse, transitional, or traditional.
- Other finishes in the room: Faucet, light fixtures, and appliance finishes should coordinate.
- Comfort and usability: Test how the pulls feel in your hand; this matters in a busy kitchen.
- Maintenance: Brushed finishes often hide fingerprints better than polished ones.
In Austin, many homeowners pair white shaker cabinets with matte black or brushed brass pulls for a modern yet warm look that works well with Texas light and color palettes.
Protecting Your Restored Cabinet Hardware Long-Term
Once you’ve done the work to restore the hardware of your white kitchen cabinets, a few habits will help it stay beautiful longer:
- Wipe hardware regularly with a soft, damp cloth to remove oils and cooking residue.
- Avoid harsh chemicals or abrasive cleaners that can break down the finish.
- Tighten any loose screws as soon as you notice them to prevent wobbling or stripping.
- Address moisture issues or leaks promptly to prevent rust or corrosion.
With minimal ongoing care, your restored cabinet hardware can look great and work smoothly for years.
Need Professional Help Restoring White Kitchen Cabinet Hardware in Austin?
Restoring cabinet hardware can be detailed work, especially if you have a large kitchen, intricate hardware, or older cabinets that need special care. If you’re in Austin, TX and want a hassle-free way to refresh your white kitchen cabinets, a professional cabinet restoration service can handle the entire process for you — from removal and refinishing to reinstallation and final touch-ups.
Instead of replacing all your cabinets, restoring the hardware and surfaces can give your kitchen a high-impact, cost-effective makeover that fits your home and your budget.
Here’s what you can expect from kitchen cabinet hardware restoration:
- Restoring cabinet hardware is a smart way to update white kitchen cabinets without a full remodel.
- Proper inspection, cleaning, rust removal, and refinishing are essential for long-lasting results.
- Popular finishes for white cabinets include brushed nickel, matte black, chrome, and warm brass tones.
- Good maintenance and occasional tightening will keep your restored hardware looking and working like new.
- A local Austin cabinet restoration professional can save you time and ensure a flawless finish.
If you’re ready to fall in love with your white kitchen cabinets again, restoring the hardware is the perfect place to start.